This and that

14 Sep

I’ve been spending the last few days doing some canning… finishing up my tomato canning (30 pints this season!), and trying out a new peach recipe (slices with maple syrup and a touch of sherry).  Each year, I get more and more into it.  And, each winter, when it’s cold and dreary out, I am more and more excited to have the treat of opening up such wonderfully summer items.  Yay!

Of course, with such fun full-day cooking activities, comes the realization that the last thing I want to do is cook more for dinner.  Which is when such simple dishes like the one below come in so handy.  One pot boiling water?  Check.  Three ingredients (green beans, potatoes, and whole wheat pasta) that all cook in the same pot?  Check.  Container of pesto and some quickly grated cheese?  Check.  And, in 30 minutes, I am done.  Love it.

Roasted Sun Gold Cherry Tomato Sauce

8 Sep

Dinner last night… and one of the best iterations of the dish yet this summer.  Love this sauce and I will be oh so sad to see it go as fall comes blowing in.   At least one more week, though, as I just ordered more Sun Golds from the CSA… yay!

Roasted Sun Gold Cherry Tomato Sauce with Whole Wheat Linguini

This recipe is one where I don’t measure or use exact oven temperatures or cook for exact amounts of time.  I generally start off slow and low, and then continually up the oven temperature as the tomatoes are starting to get soft for a bit of caramelization and to better release the juices for a saucier sauce.  If left too long on low, the tomatoes dry out, which is great if you want oven-dried tomatoes for preserving, but not great if you’re expecting to have a pasta sauce at the end.  I’ve tried to estimate the amounts, temperatures, and times, but I’ll be honest — each time it’s slightly different, both in technique and outcome.  But each time is also delicious, so I’m not too worried about it, nor should you be.

  • 3 pints of Sun Gold Cherry Tomatoes
  • 1/2 head of garlic
  • Olive Oil
  • a few sprigs of savory or thyme
  • salt
  • pepper
  • a pinch of sugar
  • 1/2 – 3/4 pound of Whole Wheat Linguini
  • Parmesan or Romano, about 1/2 – 3/4 cup grated
  1. Preheat Oven to 300 degrees.  While the oven is preheating, coarsely chop some garlic cloves, pluck a few herb stems, and then toss it all together with the tomatoes into the roasting pan, and coat with olive oil.  Add a few pinches of salt (2-3), a pinch of sugar, and finish with a few twists of pepper from the grinder.  Once the oven is heated, add the pan to the oven.
  2. Stir the tomatoes every 10 minutes or so, and after about 30-45 minutes (once the tomatoes are soft and about to burst), turn up the oven temperature to 400 or 425 degrees.
  3. At this point, start heating up the water for the pasta.  Continue stirring the tomatoes occasionally, too.
  4. Once the water is boiling (make sure to add enough salt to the water so that it tastes salty), add the pasta and cook until not quite al dente.  You want to stop before it’s at that point, as the noodles will finish cooking in the sauce.
  5. While the pasta is cooking, grate the cheese.
  6. Just before the pasta is done, remove the tomatoes from the oven, and place on the stove top.  At this point, the tomatoes should have burst, released all of their juices, and become sauce-like in consistency.  There is still definition to the tomatoes, but only somewhat.  If you have a roasting pan that can be placed on the burners, you can do so on low, but it should be hot enough that it is not necessary if you cannot.
  7. Drain the pasta, reserving at least 1/2 cup of pasta water, and toss the pasta with the sauce in the roasting pan.  Add enough of the water so that the sauce thickens (the starch in the pasta water will help with that) and more easily coats the pasta.  At this point, you can add the majority of the grated cheese and toss until it is melted into the sauce.  You want to reserve some to top the pasta on the plate.
  8. Plate, serve, and enjoy.

Asian Chicken Stock

7 Sep

A basic chicken stock from the remainder of a roasted chicken…. but with lemongrass stalks and some ginger added in for a bit of Asian seasoning.  


Shrimp, Shrimp, and more Shrimp

10 Apr

I have been eating ridiculous amounts of shrimp lately.  And I couldn’t tell you why… other than that it just sounds *good* all of the time, all of a sudden.  Although, in defense of my food-rut/obsession, each dish has been very different.  I mean, does this dish look anything like the shrimp dish below?
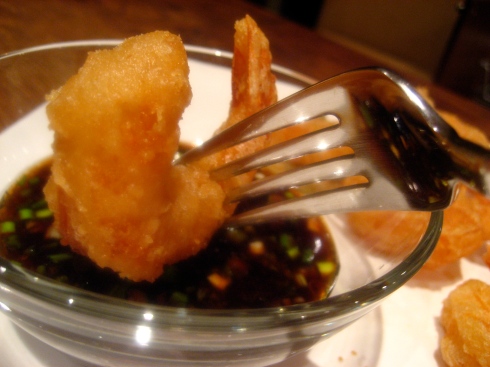
Shrimp Tempura with Miso-Ginger Dipping Sauce

Tempura Shrimp with Soy-Ginger Dipping Sauce

Nope, no, sir.  Didn’t think so.  And, really, would it even matter, with a recipe for Tempura Shrimp this good?  Just a hint, the secret is booze.  Of course.

Tempura Shrimp with Soy-Ginger Dipping Sauce, adapted from the May/June Cook’s Illustrated, serves 2

  • 1 quart canola oil
  • 3/4 pound large shrimp, peeled and deveined, tails on
  • 3/4 cup white whole wheat flour
  • 1/4 cup cornstarch
  • 1/2 egg, yes, seriously
  • 1/2 cup vodka
  • 1/2 cup seltzer water
  • kosher salt
  • 1/8 cup soy sauce
  • 1 1/2 tablespoons mirin
  • 1/2 teaspoon sugar
  • 1/2 teaspoon toasted sesame oil
  • 1 small garlic clove, minced
  • 1 teaspoon fresh ginger, grated
  • 1 scallion, finely chopped
  1. Preheat the oven to 200°.  At the same time, place the canola oil in a large pot, and heat it to 385º.
  2. While the oil and oven heat, prepare the tempura batter.  In one bowl, mix the flour and cornstarch together.  In a second bowl, whisk the vodka and egg together, and then add the seltzer water.  Don’t mix the two halves of the batter together until the oil is heated.  Also, at this time, make two small cuts on the underbelly of the shrimp, so that they lay flatter, and don’t curl up as much.
  3. Another step when the oil and oven are heating is to make the ginger-soy dipping sauce.  In a small bowl, combine the soy sauce, mirin, sugar, toasted sesame oil, garlic, fresh ginger, and the scallion.  Stir to combine, and set aside for serving.
  4. Once the oil is to 385°, combine the two halves of the tempura batter; whisking lightly.  It’s fine if some lumps remain.  Then, add the shrimp to the tempura batter, tossing to coat each piece.  Using tongs to remove shrimp one at a time, and allowing the excess batter to drip off, add them carefully to the oil (the oil should now be at 400°).  Fry, stirring occasionally to prevent sticking, 2-3 minutes, or until golden brown.  Once done, remove from oil, and place on a paper towel lined plate, and sprinkle with salt.  After the paper towels absorb the excess oil, place the shrimp on a wire rack set in a baking sheet, and place in the oven to keep warm and crisp.  Once the oil gets back up to temperature, repeat the process with the remaining shrimp.
  5.  If there is any excess batter, you can fry up vegetables of any sort, as well.  I used some snow peas, and they were delicious.  Once all finished, serve the tempura shrimp and vegetables with the ginger-soy dipping sauce.  On the side, I added peanut soba noodles.  Enjoy!
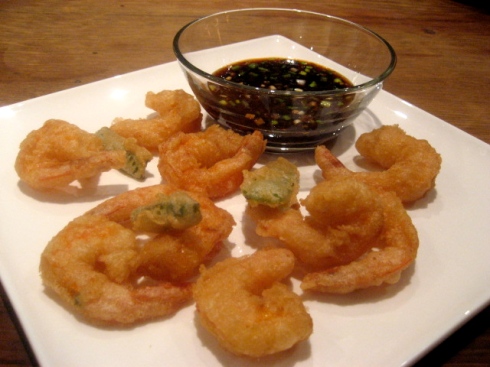
Tempura Shrimp


Weekend baking…

5 Apr

After working all week, I can’t think of anything more relaxing (and fun!) than spending the weekend in the kitchen, mixing up something delicious.  Unfortunately, though, sometimes life interferes.   Like, say, life in the form of throwing a final four watching party, volunteering at your CSA’s farm stand at the year’s first farm market, running innumerable errands, and weeding and composting the whole garden.  Which means that your relaxing cooking time, while never given up entirely, is squeezed into a smaller window.

Lemon-Sugar Crusted Blueberry Muffins

Lemon-Sugar Crusted Blueberry Muffins

Say, early Saturday and Sunday mornings.  Before the rest of the craziness descends.  But it can still yield deliciousness.  Especially when you’ve just received your latest issue of Cook’s Illustrated.  And even more so when said issue includes recipes for what it terms the *best* Blueberry Muffins and the *perfect* Chocolate Chip Cookie.

Chocolate Chip Cookies with Browned Butter

Chocolate Chip Cookies with Browned Butter

Yum.